Ever wondered how to safely remove UV gel nails at home? Many nail lovers face a challenge when it’s time to take off their gel manicure. The good news is, you can remove gel nail polish at home easily with the right steps.
Knowing how to remove UV gel nails right is key to healthy nails. The process might look hard, but it’s simple with a few steps. Whether you love DIY or want to save money, learning to remove gel nail polish at home is a great skill.
Key Takeaways
- Proper removal technique prevents nail damage
- At-home gel removal is cost-effective
- Acetone is the primary ingredient for removal
- Patience is key during the soaking process
- Post-removal nail care is essential
- Alternative removal methods are available
Understanding UV Gel Nails and Removal Importance
UV gel nails are a favorite for long-lasting manicures. They use a special polish that hardens under UV light. This creates a durable and glossy finish. But, it’s important to remove them properly to keep your nails healthy.
What are UV gel nails?
UV gel nails have a base coat, color, and top coat. Each layer is cured under a UV lamp. This makes your manicure chip-resistant and can last up to three weeks. They add strength and shine to your natural nails.
Why proper removal is crucial
Removing gel nails the right way is key for nail health. The wrong methods can weaken your nails and even cause infections. Using gentle removal techniques helps keep your nails strong and prevents damage.
Common misconceptions about gel nail removal
Some think peeling off gel polish or using electric nail drills works. But, these methods can harm your nail plate. It’s better to use safe removal techniques. Always choose acetone-based methods or get professional help to care for your nails.
“Proper gel nail removal is just as important as the application process. It’s the key to maintaining healthy, beautiful nails.”
Essential Supplies for At-Home Gel Nail Removal

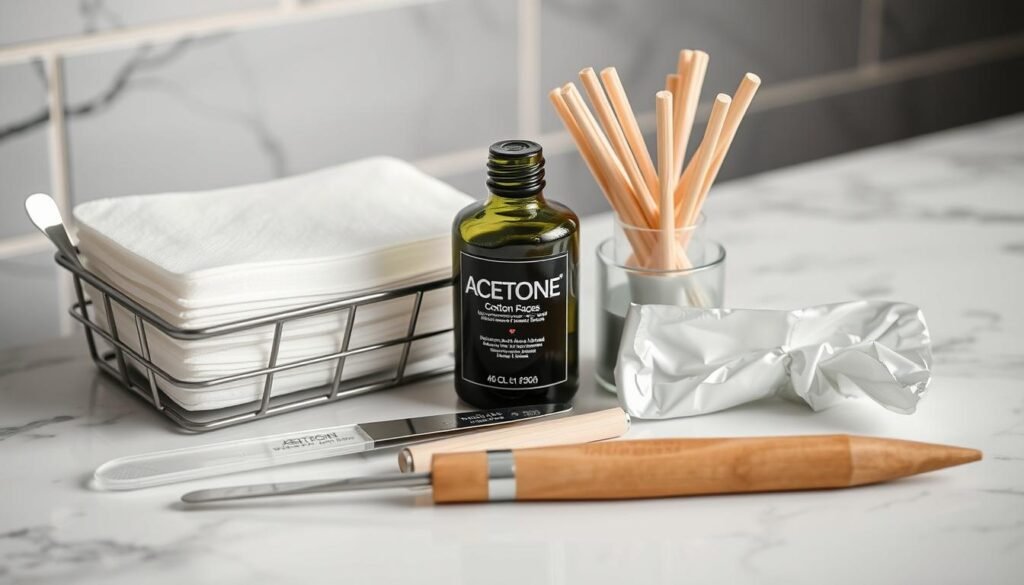
To remove gel nails at home, you need certain tools. Make sure you have these items ready before you start:
- Nail file (180 grit)
- Cuticle pusher
- Cotton balls or pads
- 100% pure acetone for gel nail removal
- Nail buffer
- Aluminum foil
- Cuticle oil
These tools are key for the traditional acetone method. A nail file breaks the top coat seal. Cotton and foil keep the acetone in place. A cuticle pusher helps remove the softened gel, and the buffer smooths your nails afterward.
For a gentler option, consider a specialized gel nail polish remover. It might need fewer tools and is less harsh on your nails. Choose your method wisely. Make sure your workspace is well-ventilated and protected to avoid damage.
“Proper tools and preparation are key to successful at-home gel nail removal.”
Acetone is strong, so handle it with care. Always use cuticle oil after removal to restore moisture and strengthen your nails.
How to Remove UV Gel Nails: Step-by-Step Guide
Removing UV gel nails at home is easy and safe if you follow the right steps. This guide will show you how to do it without harming your nails.
Preparation and Safety Precautions
First, get your tools ready and work in a room with good air flow. Put petroleum jelly around your nails to protect your skin from acetone.
Filing the Top Coat
Lightly file the top of your gel polish. This helps the acetone soak in better when you remove it.
Applying Acetone and Wrapping Nails
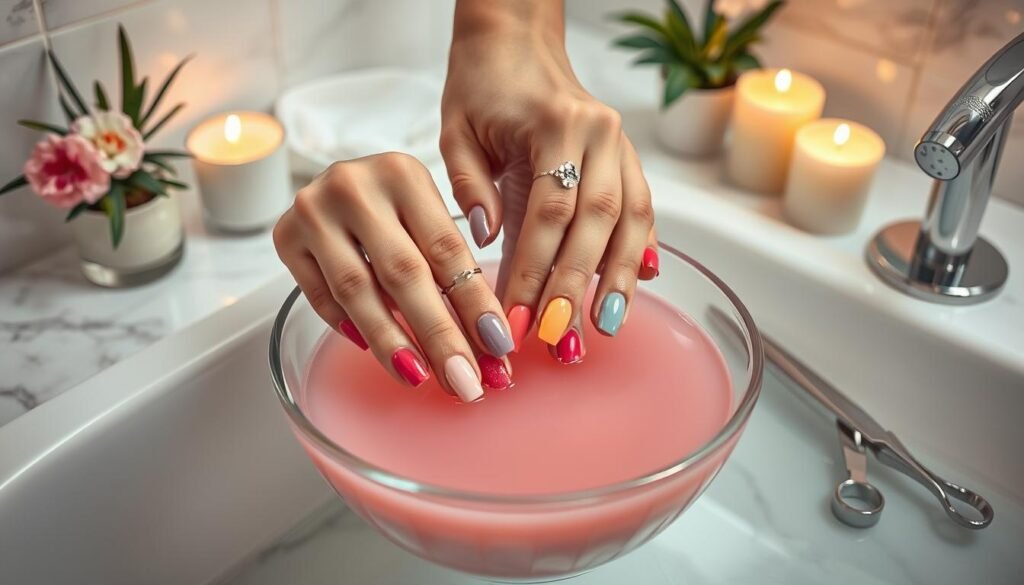
Soak cotton pads in pure acetone and put one on each nail. Then, wrap your fingers in aluminum foil to keep the cotton in place. Let it soak for 10-15 minutes.
Removing the Softened Gel Polish
After soaking, use a cuticle stick to gently remove the softened gel. If some gel stays, wrap and soak again for 5 minutes. Don’t push too hard to avoid damaging your nails.
Post-removal Nail Care
After removing all gel, take care of your cuticles. Apply cuticle oil to moisturize your nails and skin. If needed, buff your nails and then apply a strengthening base coat.
| Step | Duration | Key Point |
|---|---|---|
| Preparation | 5 minutes | Ensure proper ventilation |
| Filing | 2-3 minutes | Break seal gently |
| Acetone Soak | 10-15 minutes | Use pure acetone |
| Gel Removal | 5-10 minutes | Be patient, don’t force |
| Nail Care | 5 minutes | Hydrate and strengthen |
Alternative Methods for Gel Nail Removal

The gel nail removal process doesn’t always need acetone. Let’s look at gentler methods that still remove gel polish well.
Using Gel Nail Polish Removers
Special gel nail polish removers are quicker and gentler. They work in about 5 minutes and have little smell. They’re good for your nails.
Professional Removal Options
Going to a salon for removal is a great choice. Experts use special tools to remove gel polish safely. It’s best for sensitive nails or if you’re new to gel manicures.
| Removal Method | Time | Cost | Nail Health Impact |
|---|---|---|---|
| At-home Acetone | 30-45 minutes | Low | Moderate |
| Gel Nail Polish Remover | 5-10 minutes | Moderate | Low |
| Professional Salon | 15-20 minutes | High | Minimal |
Salon removal might cost more, but it’s safer for your nails. Always take care of your nails after removal, no matter the method.
Conclusion
Learning to remove UV gel nails at home can save you a lot of time and money. With the right tools and methods, you can safely remove your gel manicure. This way, you won’t damage your natural nails.
Remember to file the top coat first. Then, soak your nails in acetone. Finally, gently remove the softened polish.
Removing gel nails at home requires patience. Don’t try to peel or force the gel off, as it can harm your nails. Instead, use acetone or specialized gel nail polish removers.
These gentle methods help keep your nails healthy and strong. After removing your gel nails, take care of your natural nails. Apply cuticle oil and moisturizer to keep them hydrated.
With practice, you’ll get better at removing gel nails at home. This way, you can keep your nails looking great between salon visits. Remember, healthy nails are the key to any beautiful manicure.


Interesting read, but arent UV gel nails just a ploy to keep us visiting salons more often? #JustAThought #DIYForever
Interesting read but why not promote natural nails instead of constantly damaging and restoring them with UV gel nails? Just a thought.
Interesting read, but honestly, isnt it healthier to avoid UV gel nails altogether? What about promoting natural nail care? Just a thought.
Anyone else think UV gel nails are overrated? Id rather stick to my natural nails. Less hassle and honestly, healthier!
Its just nails, folks. Why not just let them grow out naturally, instead of all these complicated removal methods? #justsaying
I get the importance, but isnt all this fuss about removing UV gel nails a bit much? Nothing a good chip-off cant handle!
Interesting read, but honestly, arent UV gel nails just an unnecessary indulgence? Why not embrace natural beauty instead? Just food for thought.
Interesting read, but honestly, why bother with UV gels? Contributes to plastic waste, and the removal process is a nightmare, isnt it?
Interesting read but, honestly, why fuss over removal when you can just let UV gel nails grow out naturally? 🤷♀️
Because constantly catching hair in overgrown gel nails isnt my idea of fun, Susan! 🙄
Interesting read, but isnt it healthier to let the UV gel nails grow out naturally instead of forcing removal? Just a thought.
Interesting read but Im wondering, are we sacrificing nail health for beauty? Seems like a harsh removal process. Thoughts anyone?
Nail health over vanity any day! Harsh removal process equals damage, no argument there.
Seriously? Home removal? Ive always heard thats risky business! Are you sure it wont destroy my nails? #skeptical #beautyrisk
I get the safety bit, but isnt this just a clever move to stop us from visiting salons? Conspiracy much? 🤔
Interesting read, but why overcomplicate? I just chip mine off while watching Netflix. Who really needs these proper removal methods anyway?
Interesting read, but arent we just promoting unnecessary vanity? Also, isnt UV exposure harmful? Any thoughts on this?